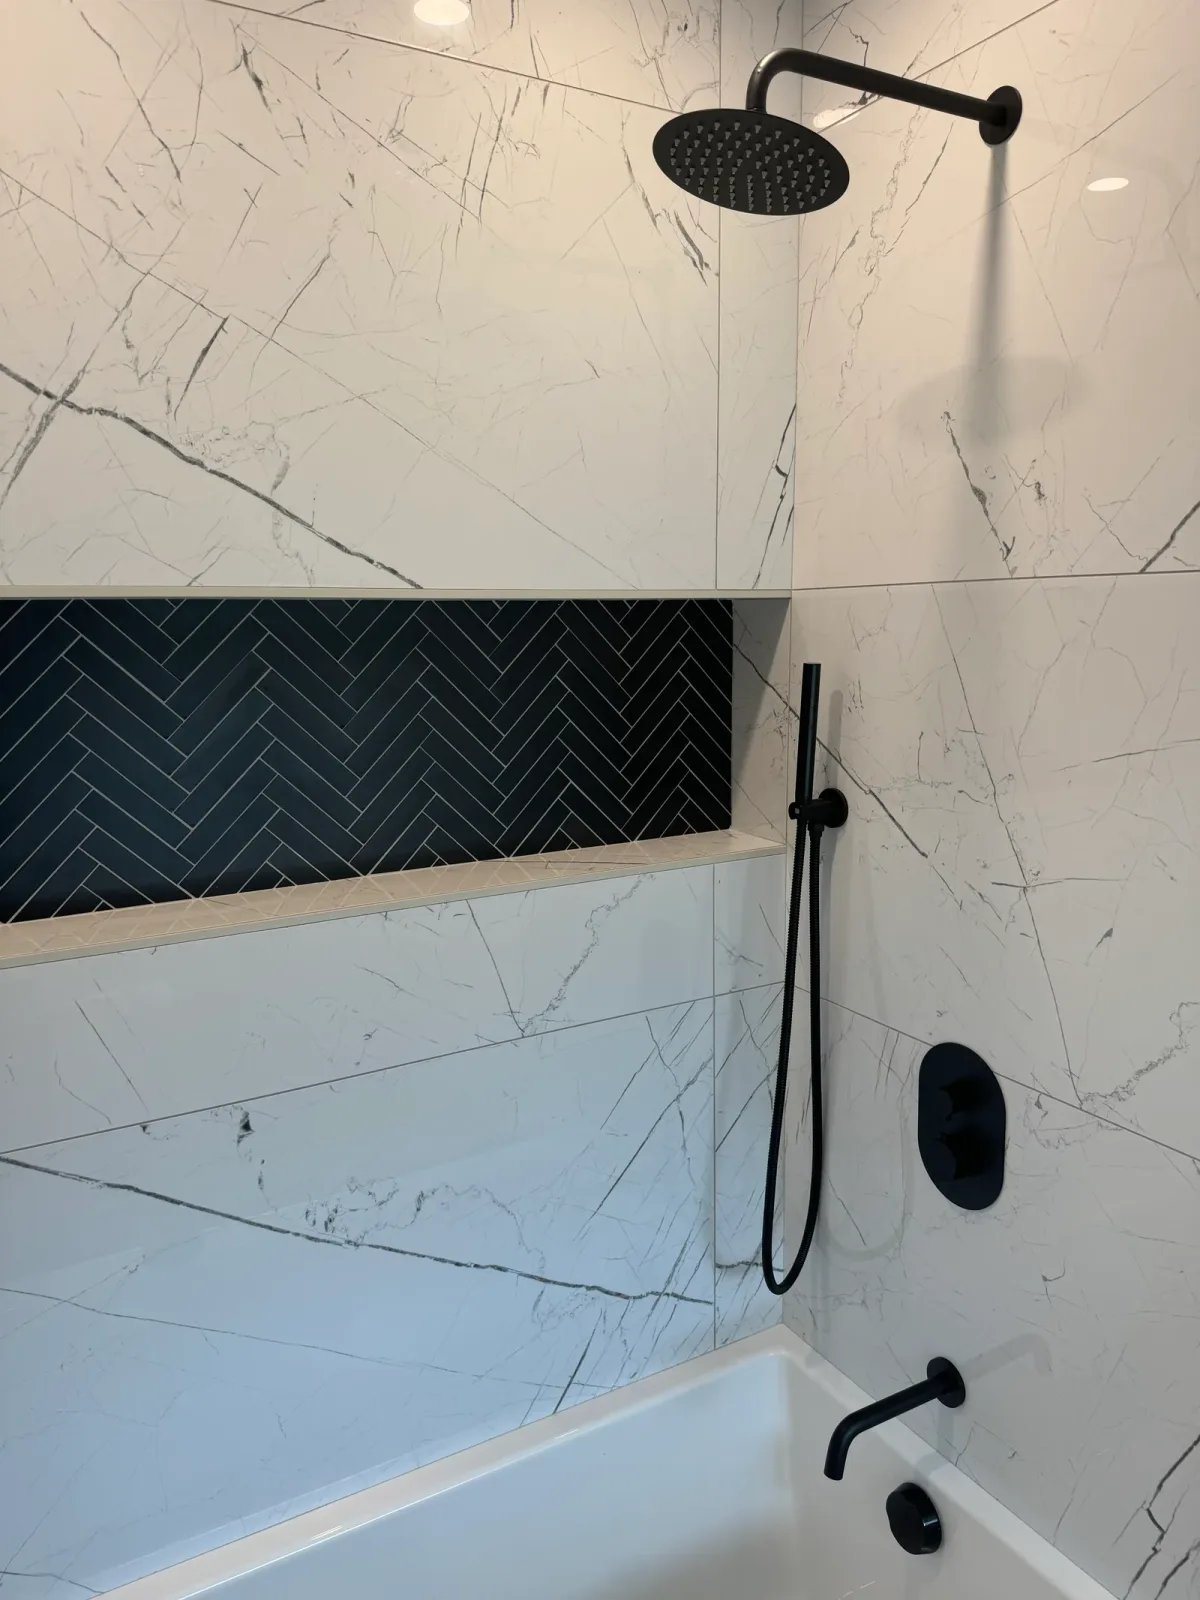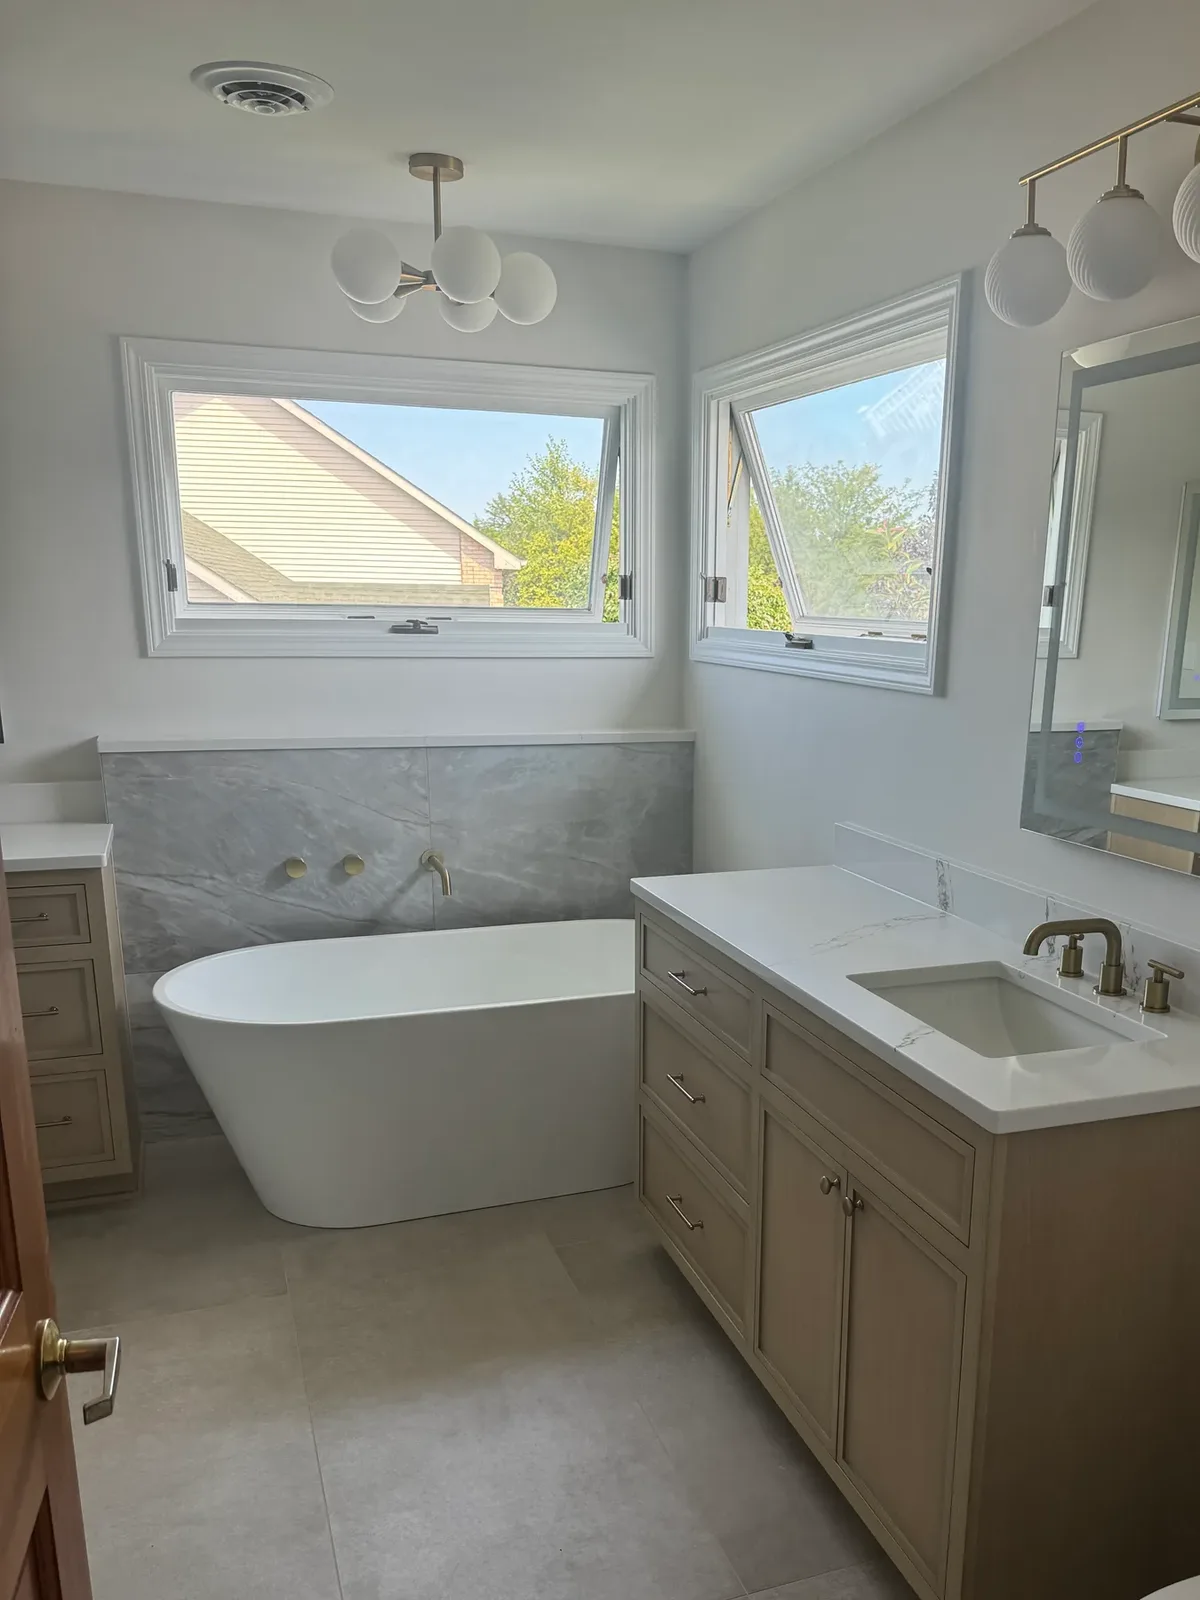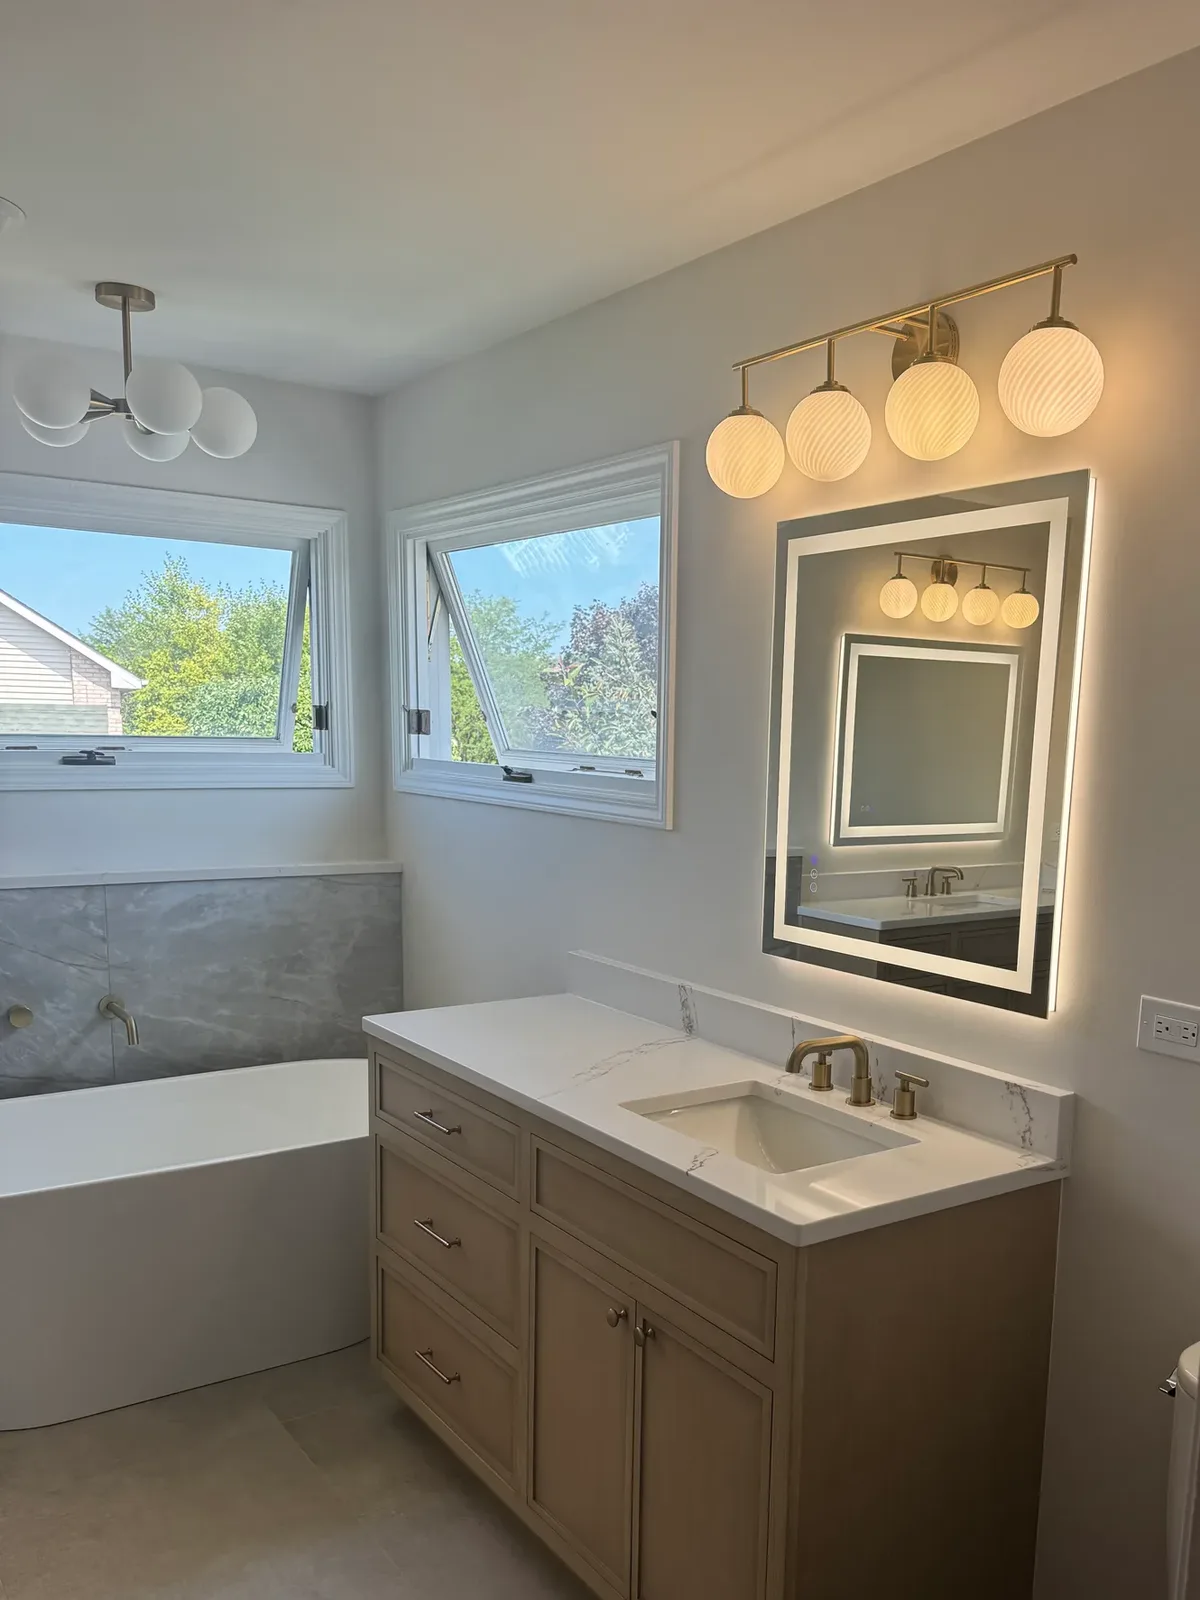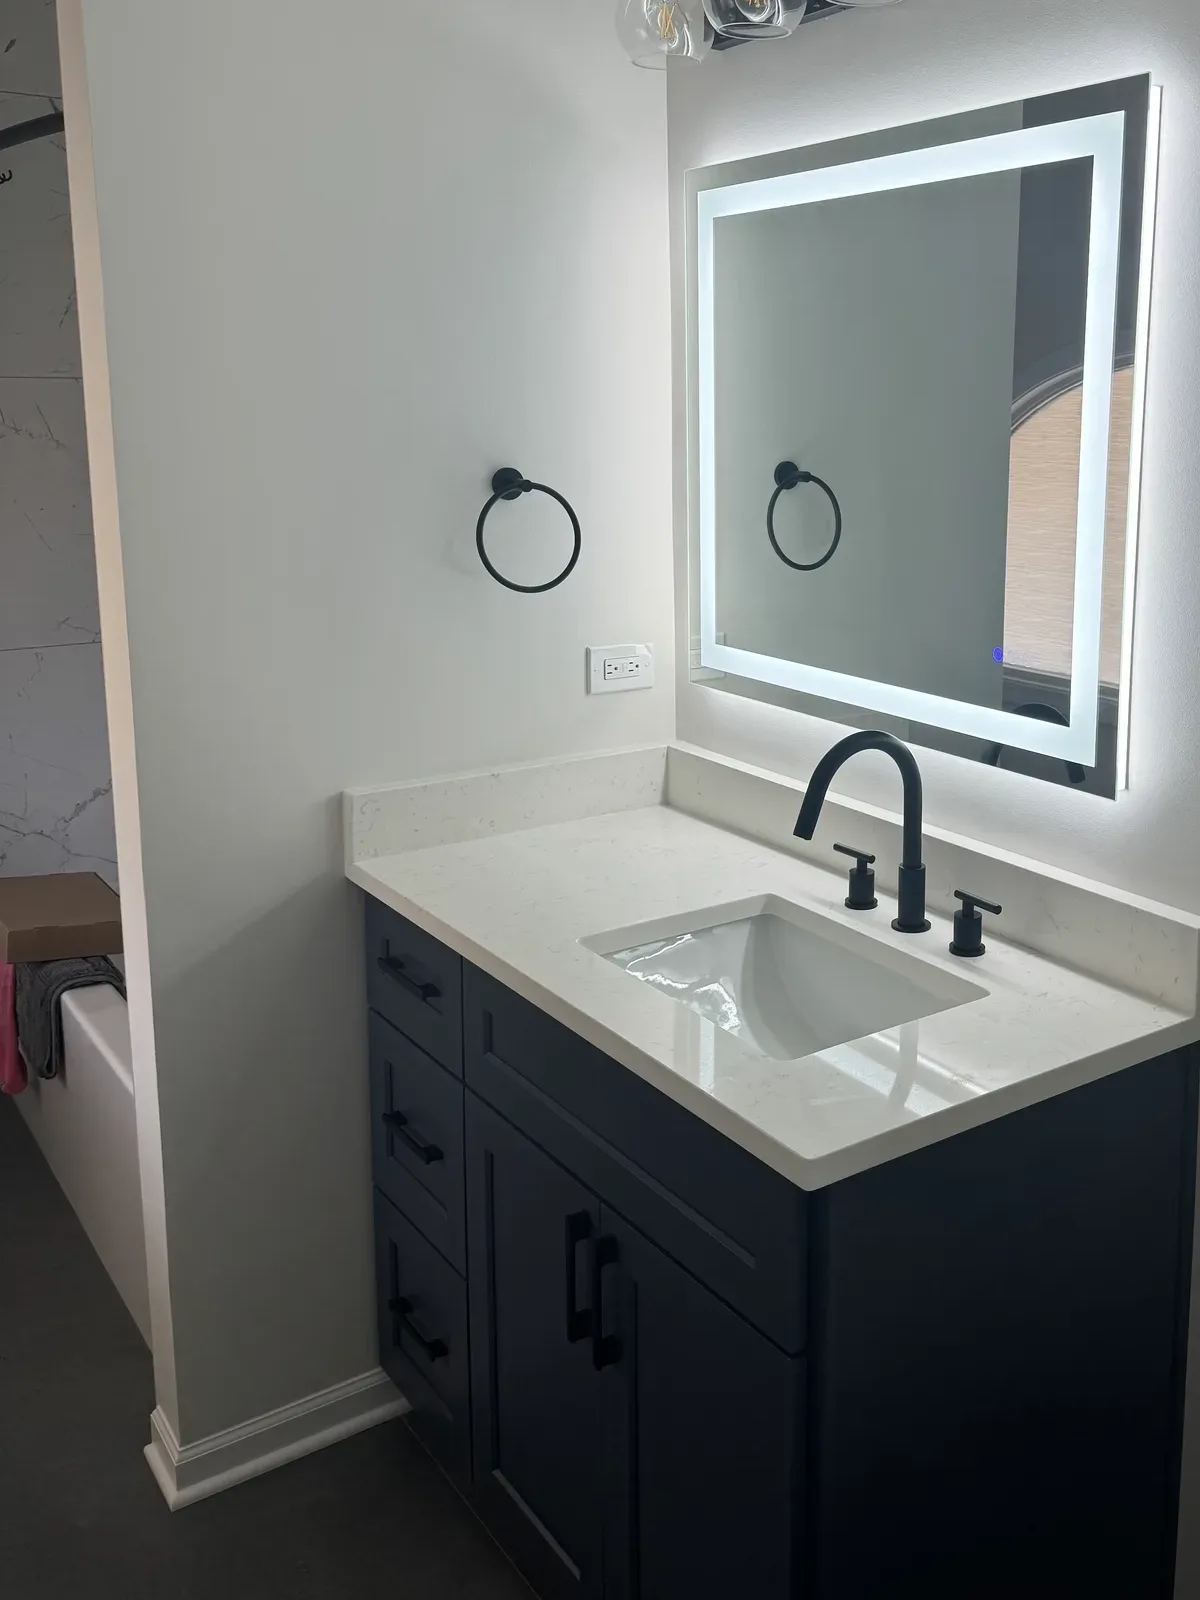
Primary bathroom in a bathroom and laundry renovation in Shorewood, IL, with a light-oak vanity, a white quartz top with grey veining, a backlit mirror, brass globe lighting and a grey marble-look porcelain tub wall by Luxe Development
5.0 on Google · Lemont, IL
Bathroom & Laundry Renovation · Shorewood, IL

Bathroom and Laundry Renovation in Shorewood, IL: Before and After

A house where every wet room wore the same era: a corner jetted tub set into a tiled deck, seafoam-green tile counters, and oak on every edge. The primary bath and the guest bath came out to the studs, and the laundry was rebuilt in the same project. What went back is light oak, quartz and brass in one room, white marble-look porcelain and matte black in the next.

One Accountable Team

Architect, engineer & builder, one team

Fixed, Itemized Budgets

Priced in full before we break ground

The Same Hands

On every project, framing to finish

Lemont, Illinois

Design-build for the western suburbs

At a Glance

The project, at a glance.

One house in Shorewood, rebuilt room by room: the primary bath, the guest bath and the laundry. Here is the scope in short.

  • LocationShorewood, IL
  • ScopePrimary bathroom and guest bathroom taken back to the studs; laundry room rebuilt
  • ServicesBathroom remodeling, luxury remodeling, tile and stone, cabinetry, interior design
  • ApproachDesign-build, one team
Before & After

Before and after, room by room in Shorewood.

Three comparisons from the two bathrooms: the primary vanity wall, the primary shower and the guest tub alcove.

You are judging the work here, not the photography.

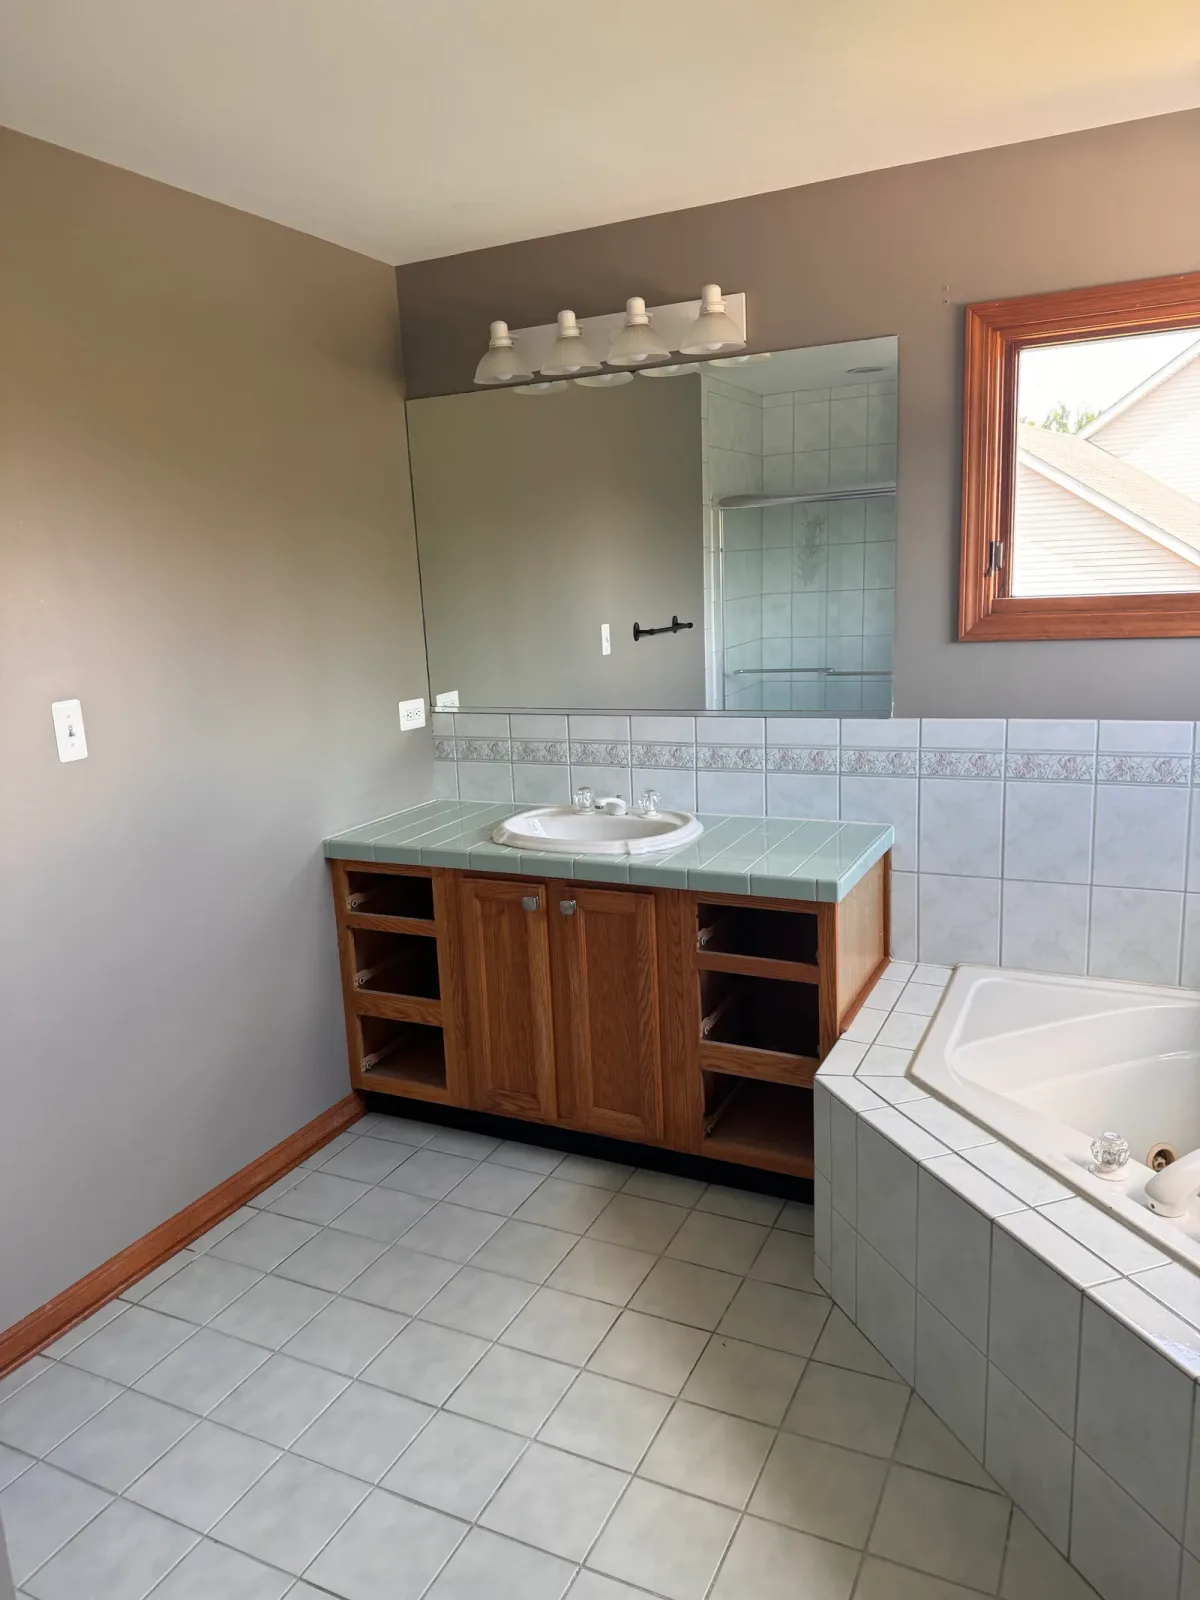
Primary bathroom before photo, Shorewood IL - oak vanity with a seafoam-green tile countertop, an oval drop-in sink and a frameless plate mirror, with the corner jetted tub at right
Before

The primary vanity wallOak, seafoam tile counter, drop-in sink

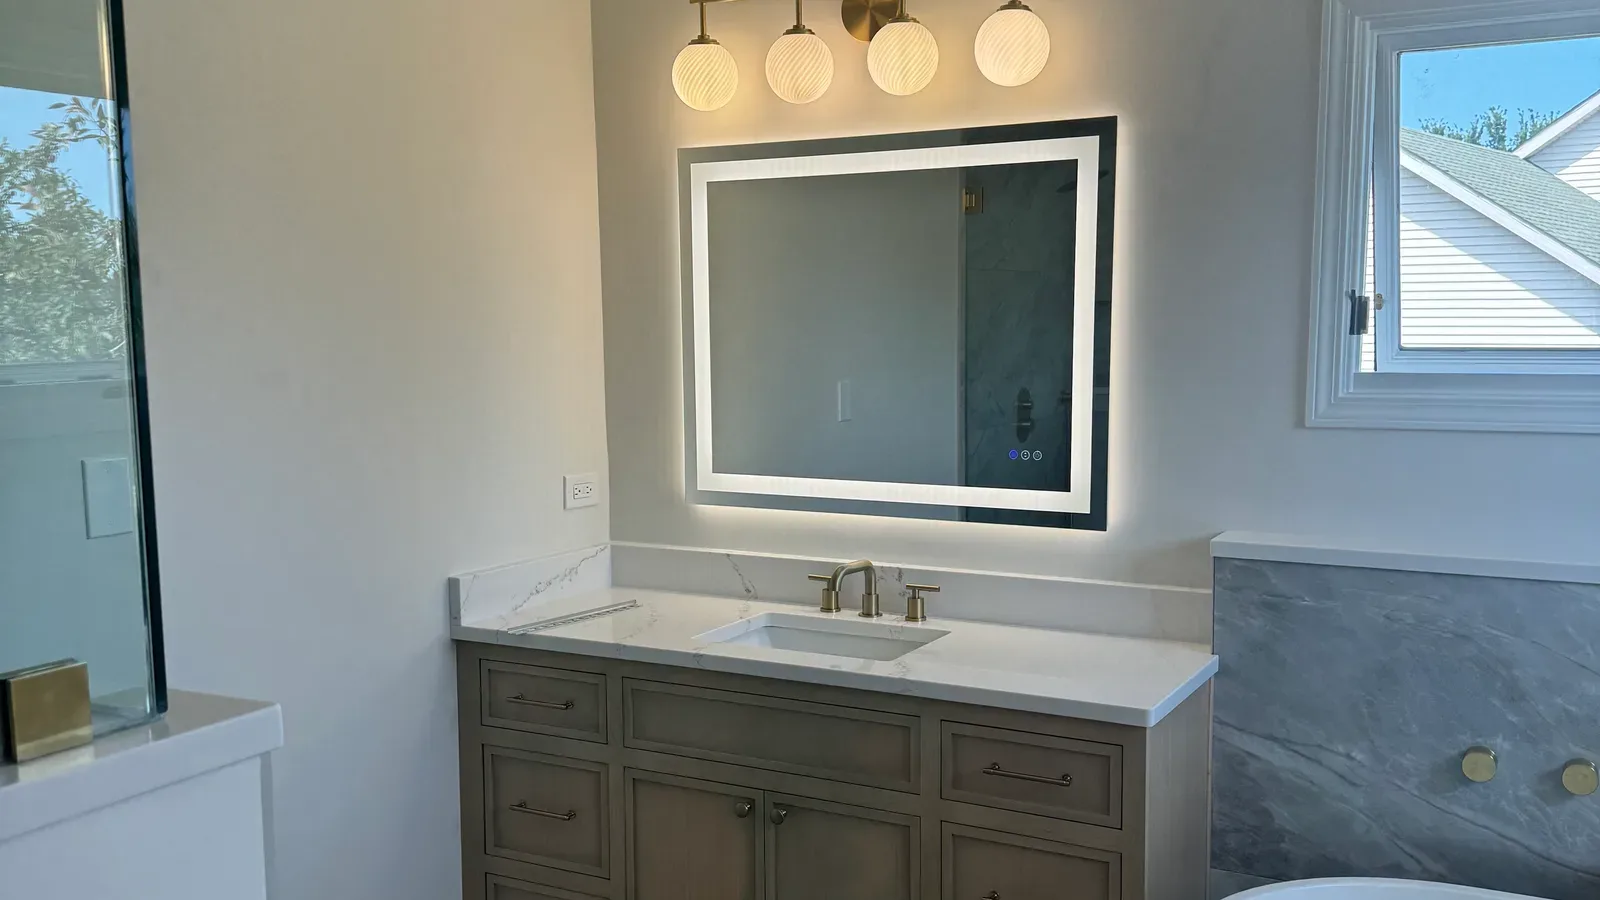
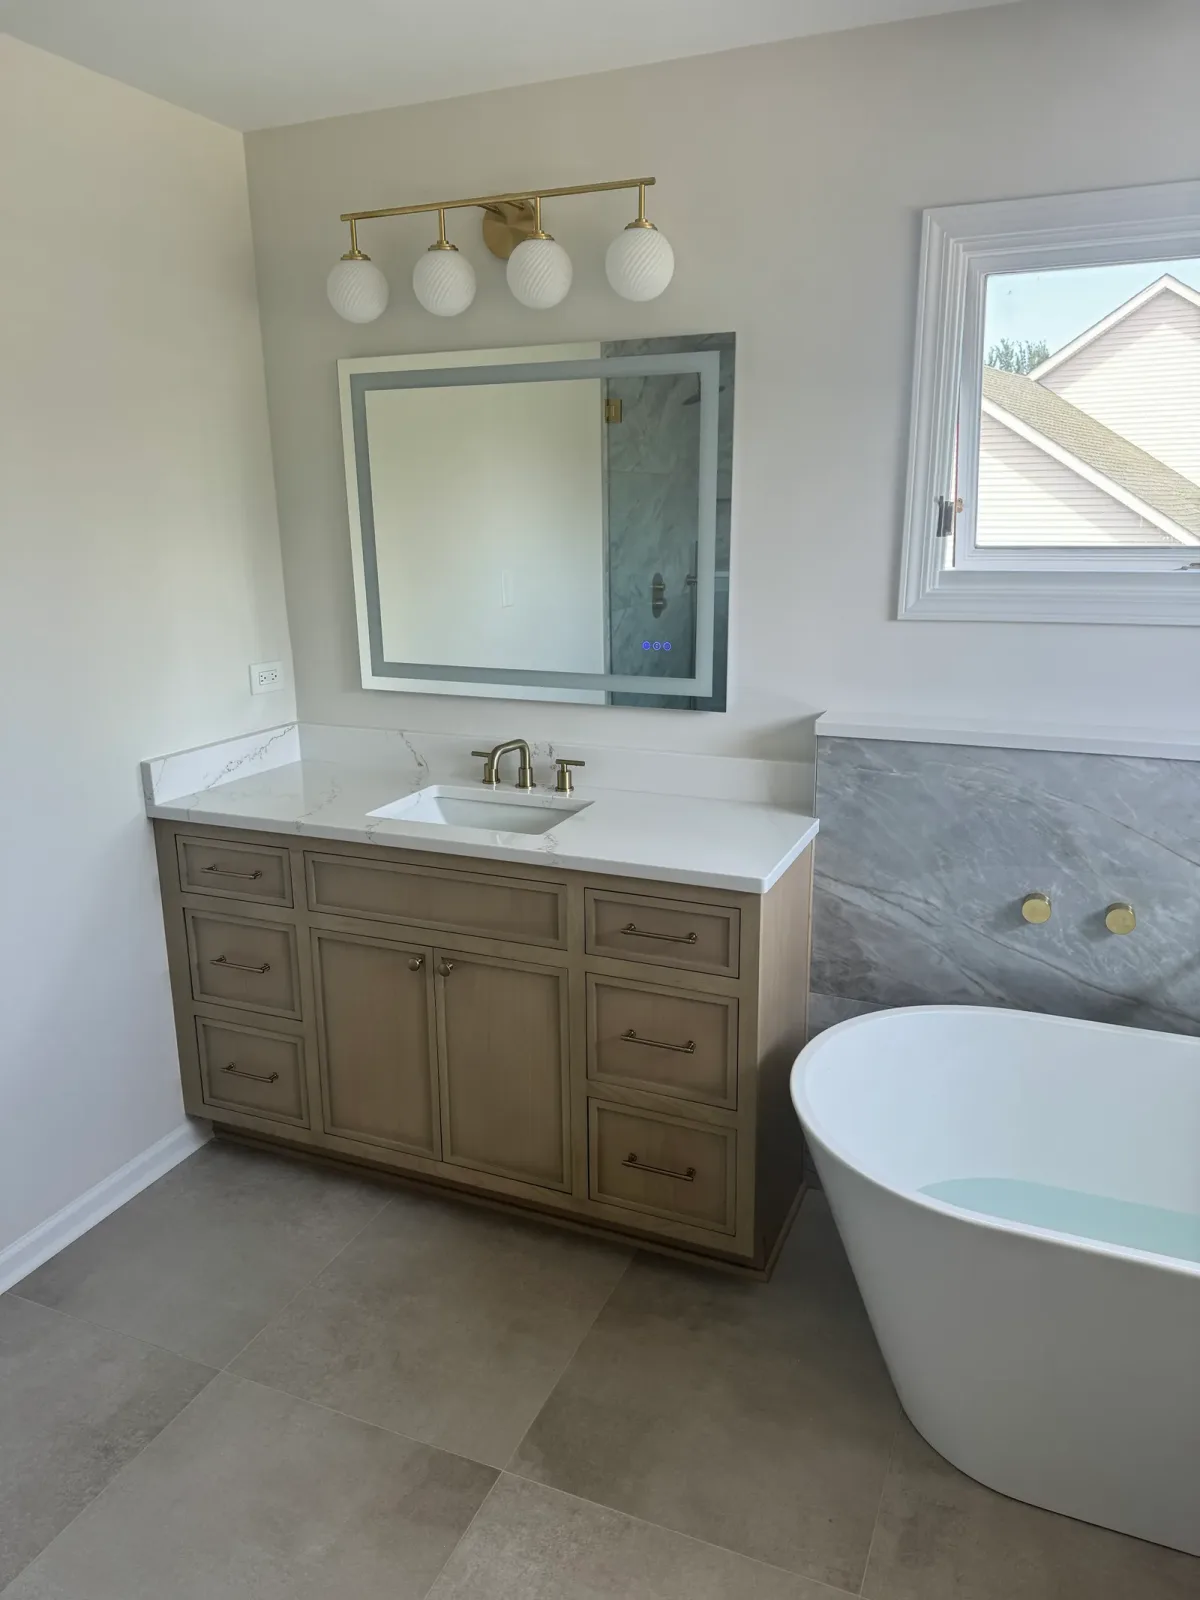
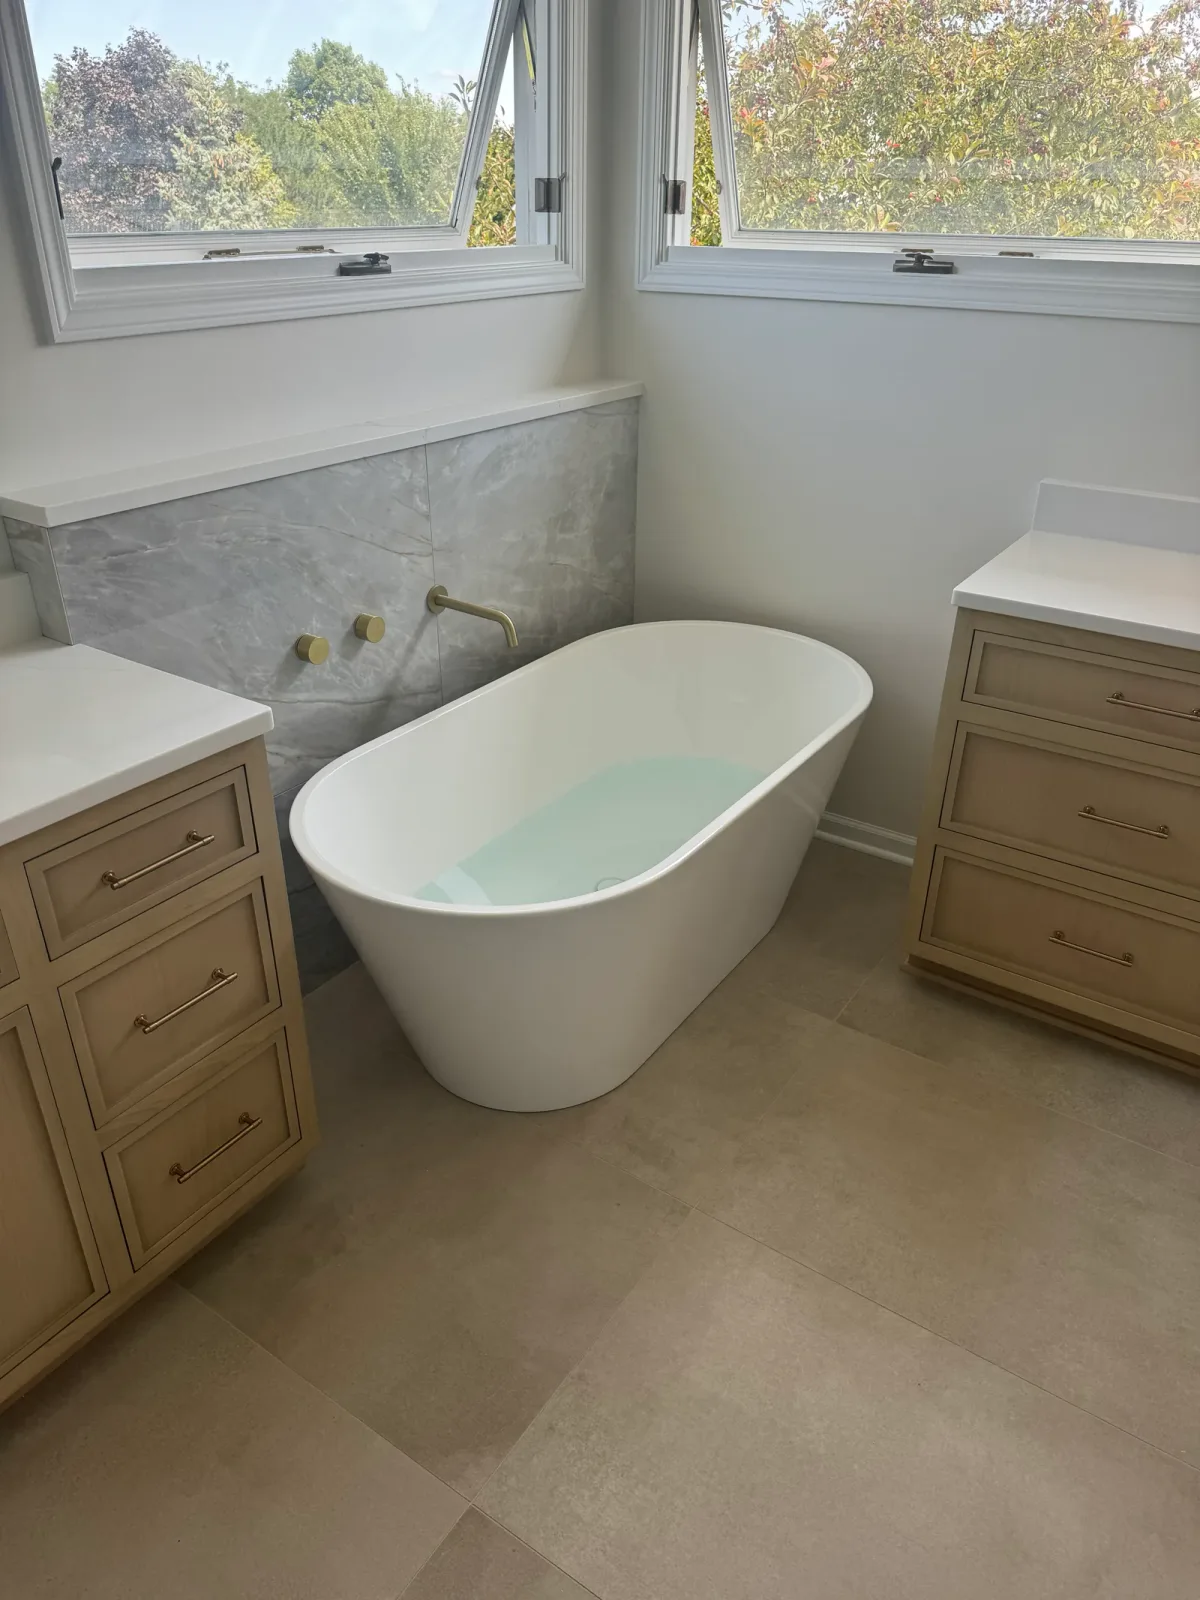
Primary bathroom remodel after photo, Shorewood IL - light-oak vanity with a white quartz top, a rectangular undermount basin, brass tapware and a backlit mirror, with the freestanding tub at right
After

The primary vanity wallLight oak, quartz, brass, backlit mirror

The window at the upper right and the tub in the lower right anchor both frames, so this pair is easy to read. The oak vanity was already half stripped when the before was shot - the drawer boxes are out of both flanking stacks - and all of it went: the seafoam-green tile countertop with its grouted joints, the oval drop-in sink, its faucet on clear acrylic knobs, the frameless plate mirror and the four-shade light bar. In their place: light-oak cabinetry with brass bar pulls, a white quartz top with grey veining and an integral backsplash, a rectangular undermount basin, brass tapware, a backlit mirror and a brass four-globe fixture. The tiled corner deck went with them, and a freestanding tub now stands against a grey marble-look porcelain wall. The after frame is shot from slightly closer in.

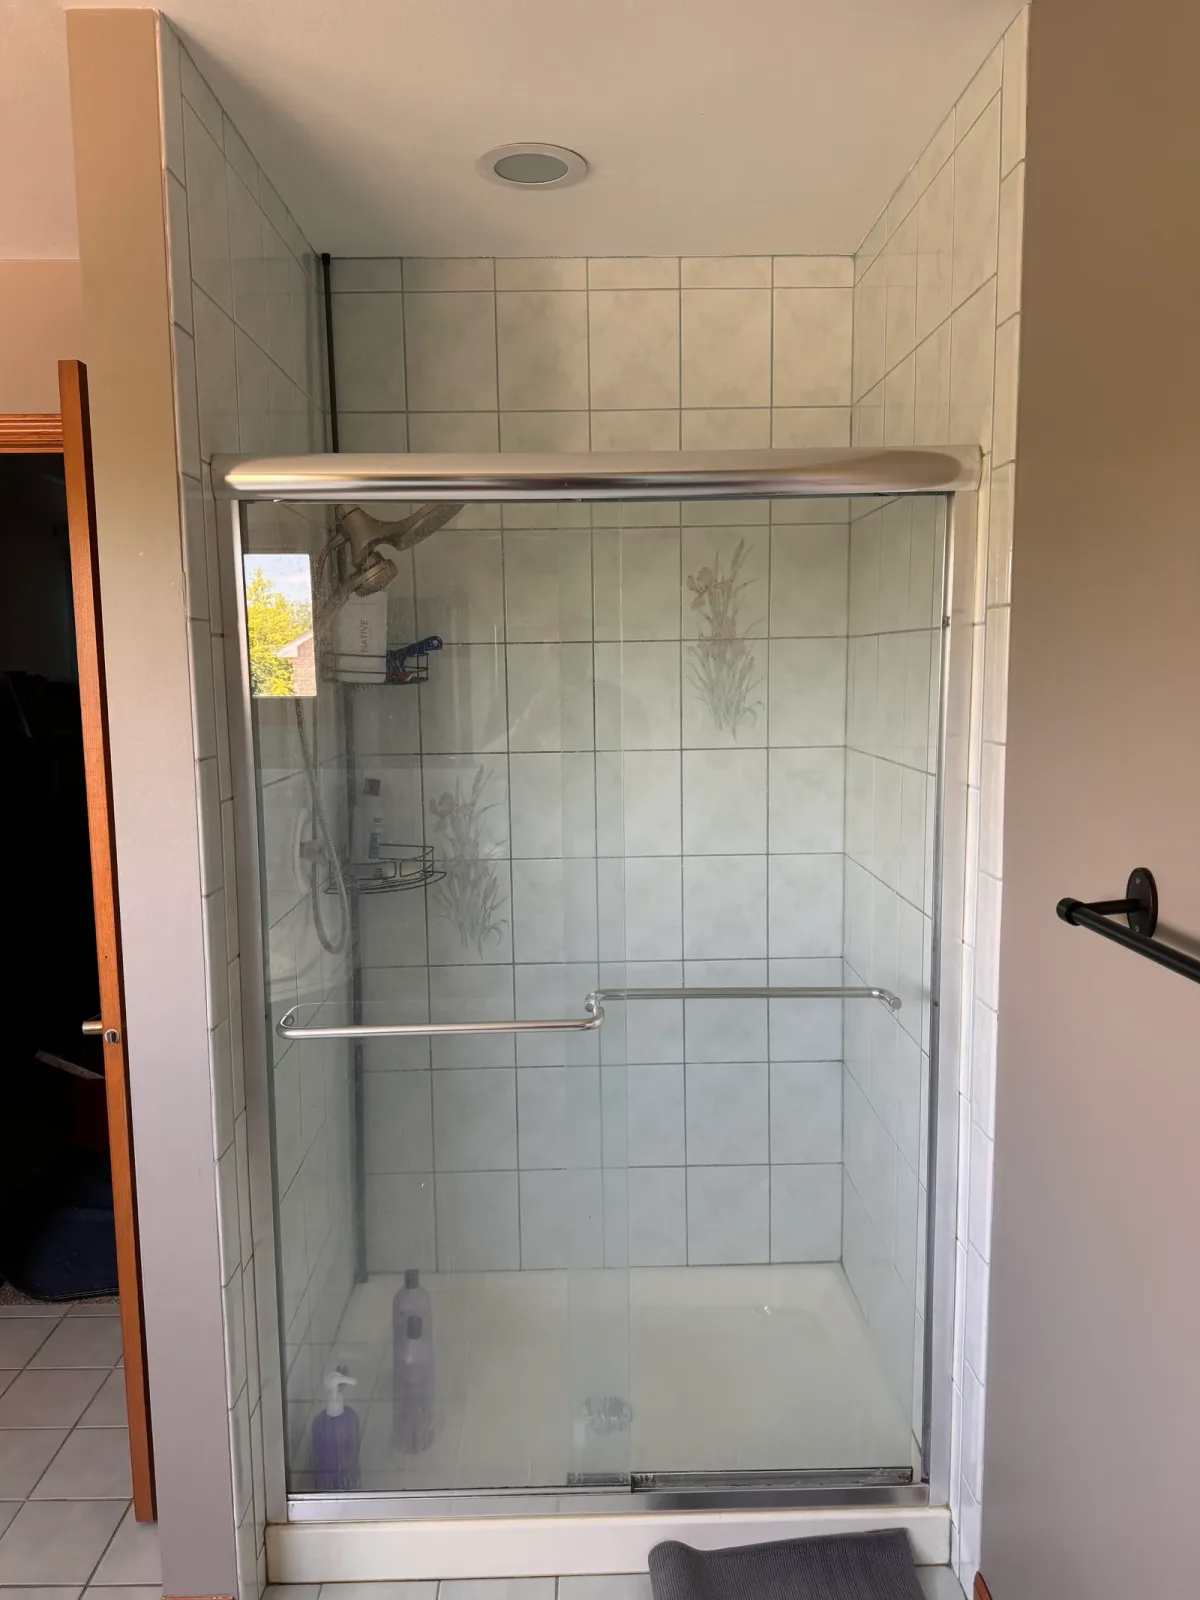
Primary bathroom shower before photo, Shorewood IL - boxed shower behind a framed sliding-glass enclosure, lined in square field tile with painted iris accent tiles
Before

The primary showerFramed sliding glass, square field tile

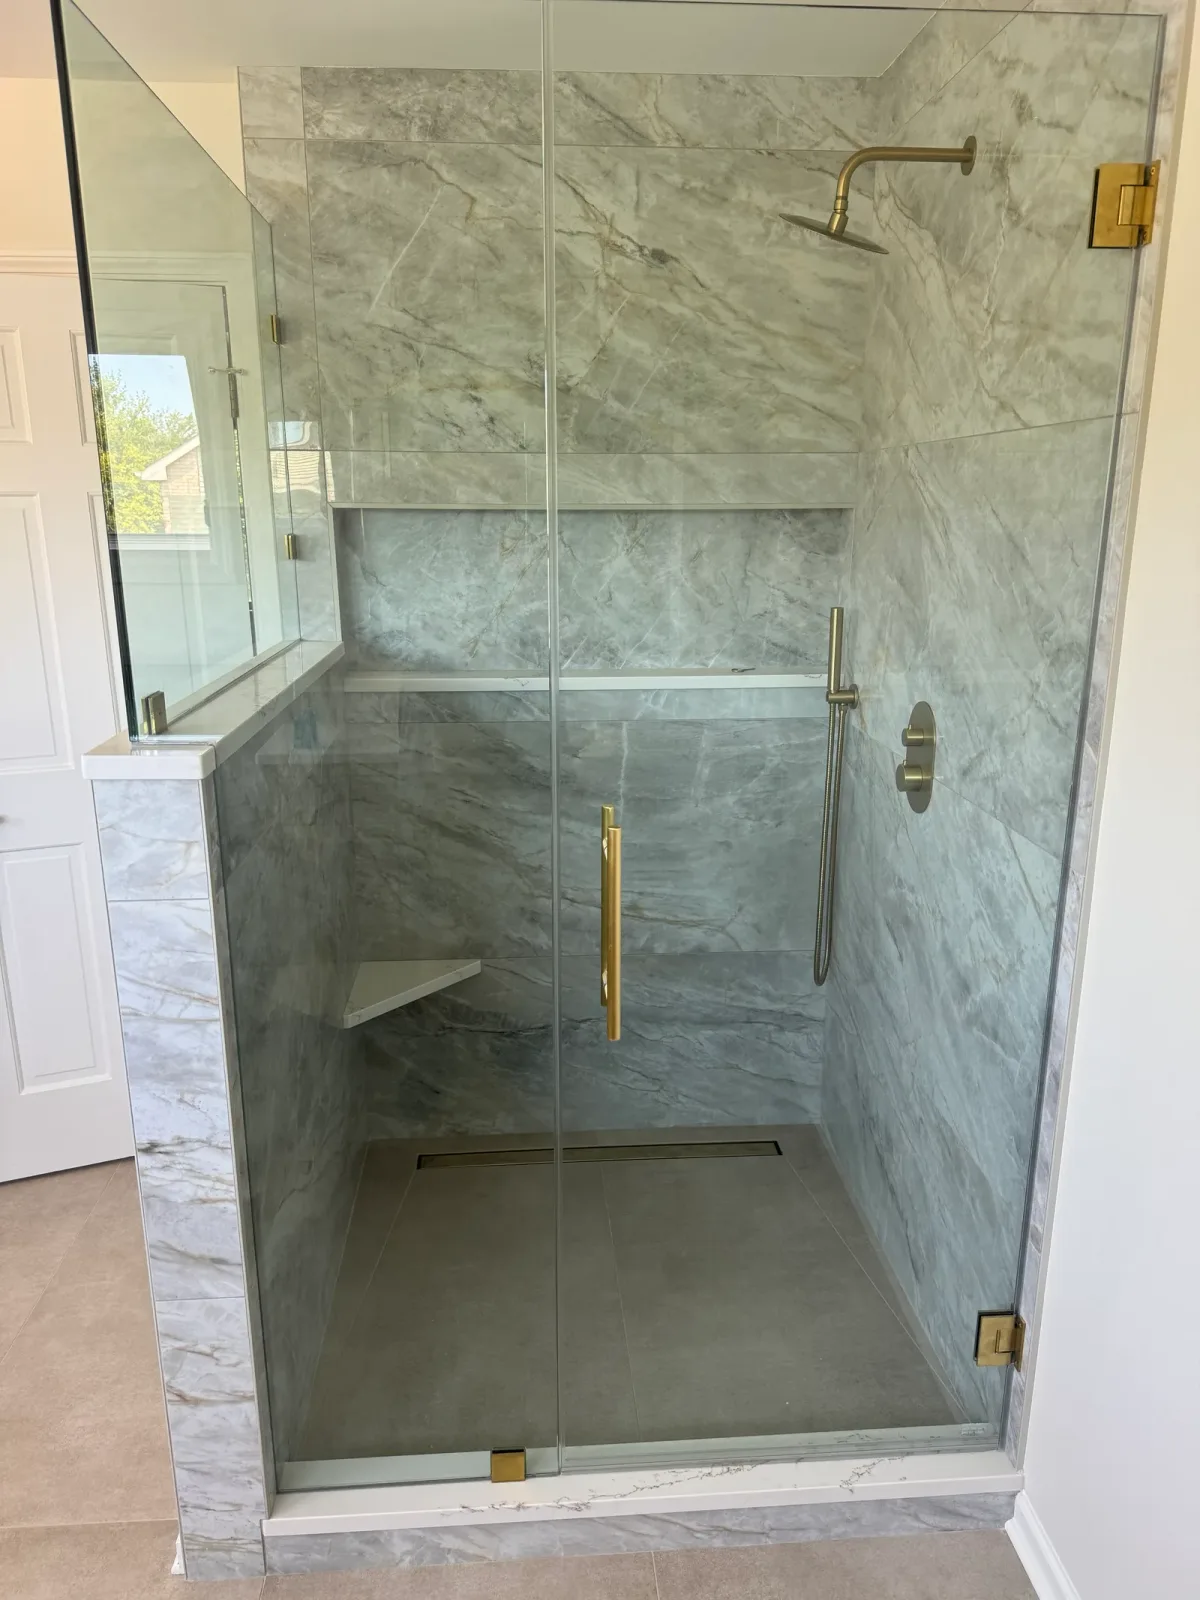
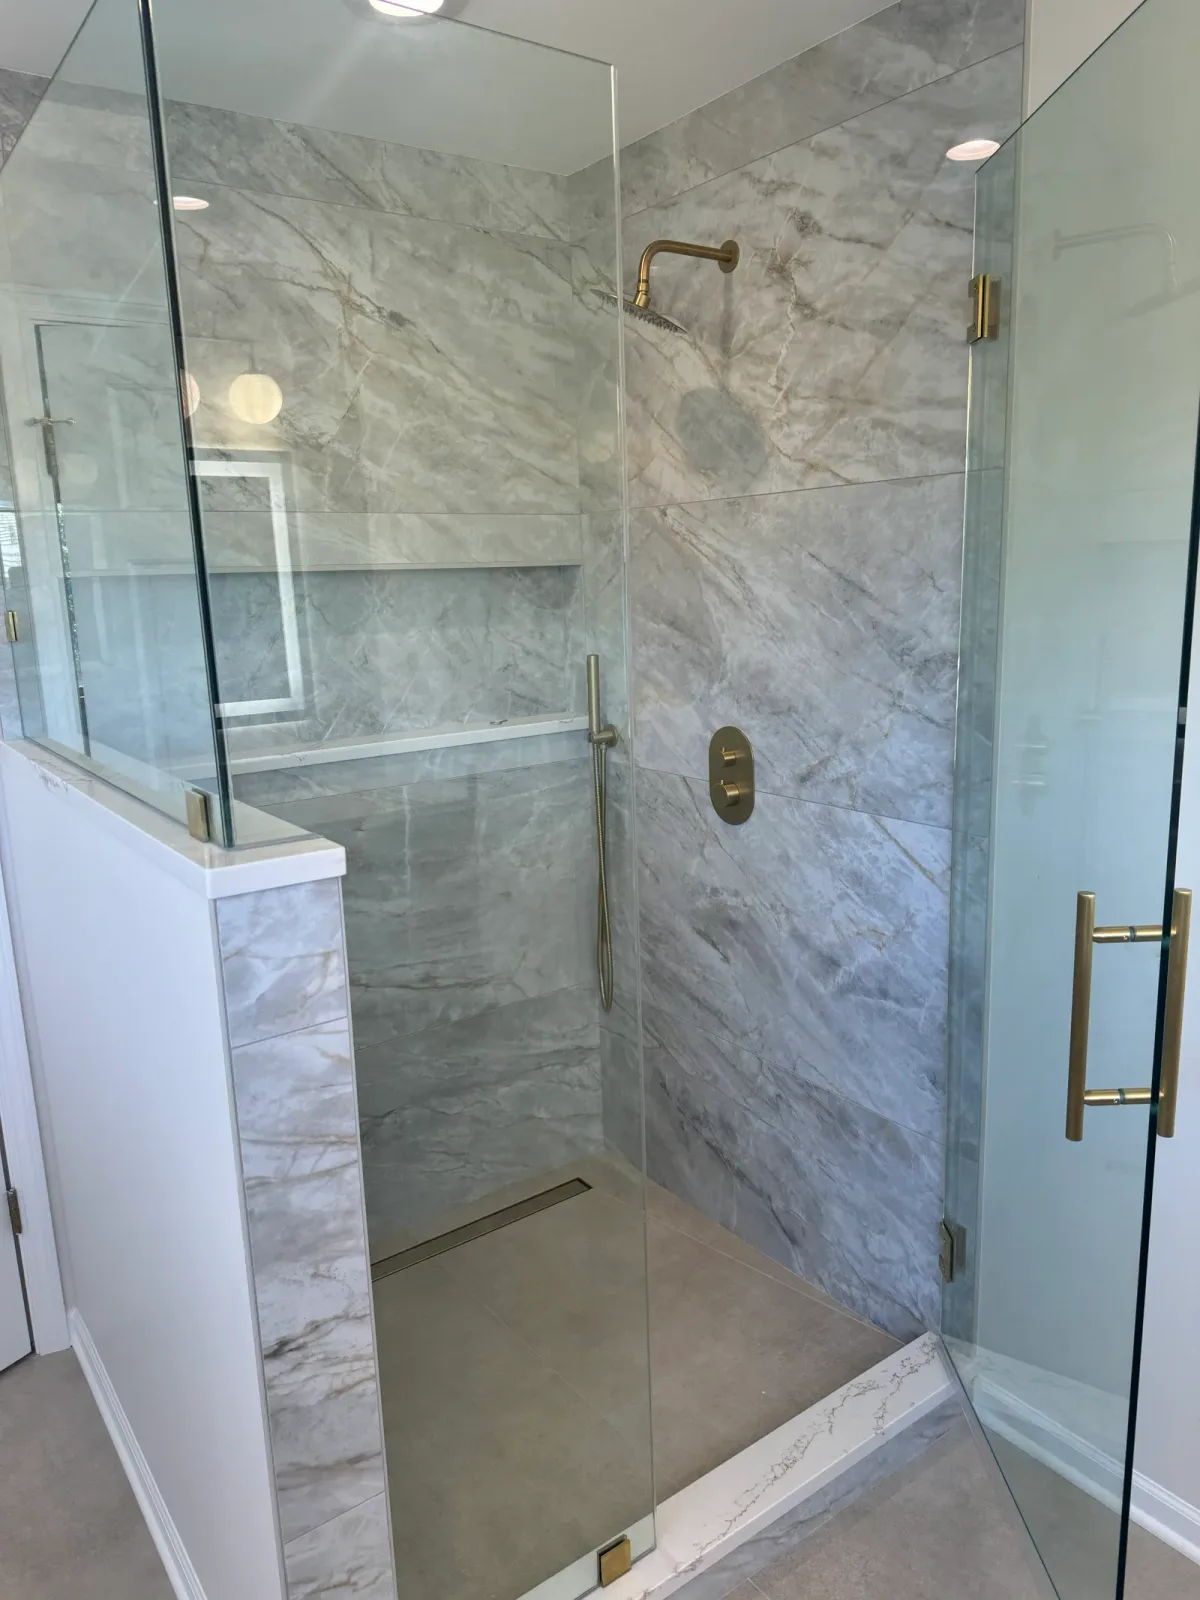
Shower remodel after photo, Shorewood IL - frameless glass shower lined in large-format grey marble-look porcelain with a brass rain head, a brass handshower and a brass ladder pull
After

The primary showerFrameless glass, large-format porcelain, brass

The shower kept its corner but not its footprint. The before is shot square into the alcove; the after is taken from the left, where a porcelain-clad knee wall and a glass return now open the enclosure up, so read the surfaces here rather than the geometry. The framed sliding enclosure with its brushed header and towel rails is gone, and so is the square field tile, the painted iris accents and the grid of grout that came with them. What replaced it is large-format grey marble-look porcelain with gold-brown veining, run floor to ceiling and wrapped into a full-width recessed niche, behind frameless glass on brass hinges with a brass ladder pull. A brass rain head, a brass handshower and one brass control sit together on the side wall, a corner seat sits opposite, and the floor now drains to a linear channel rather than a moulded pan.

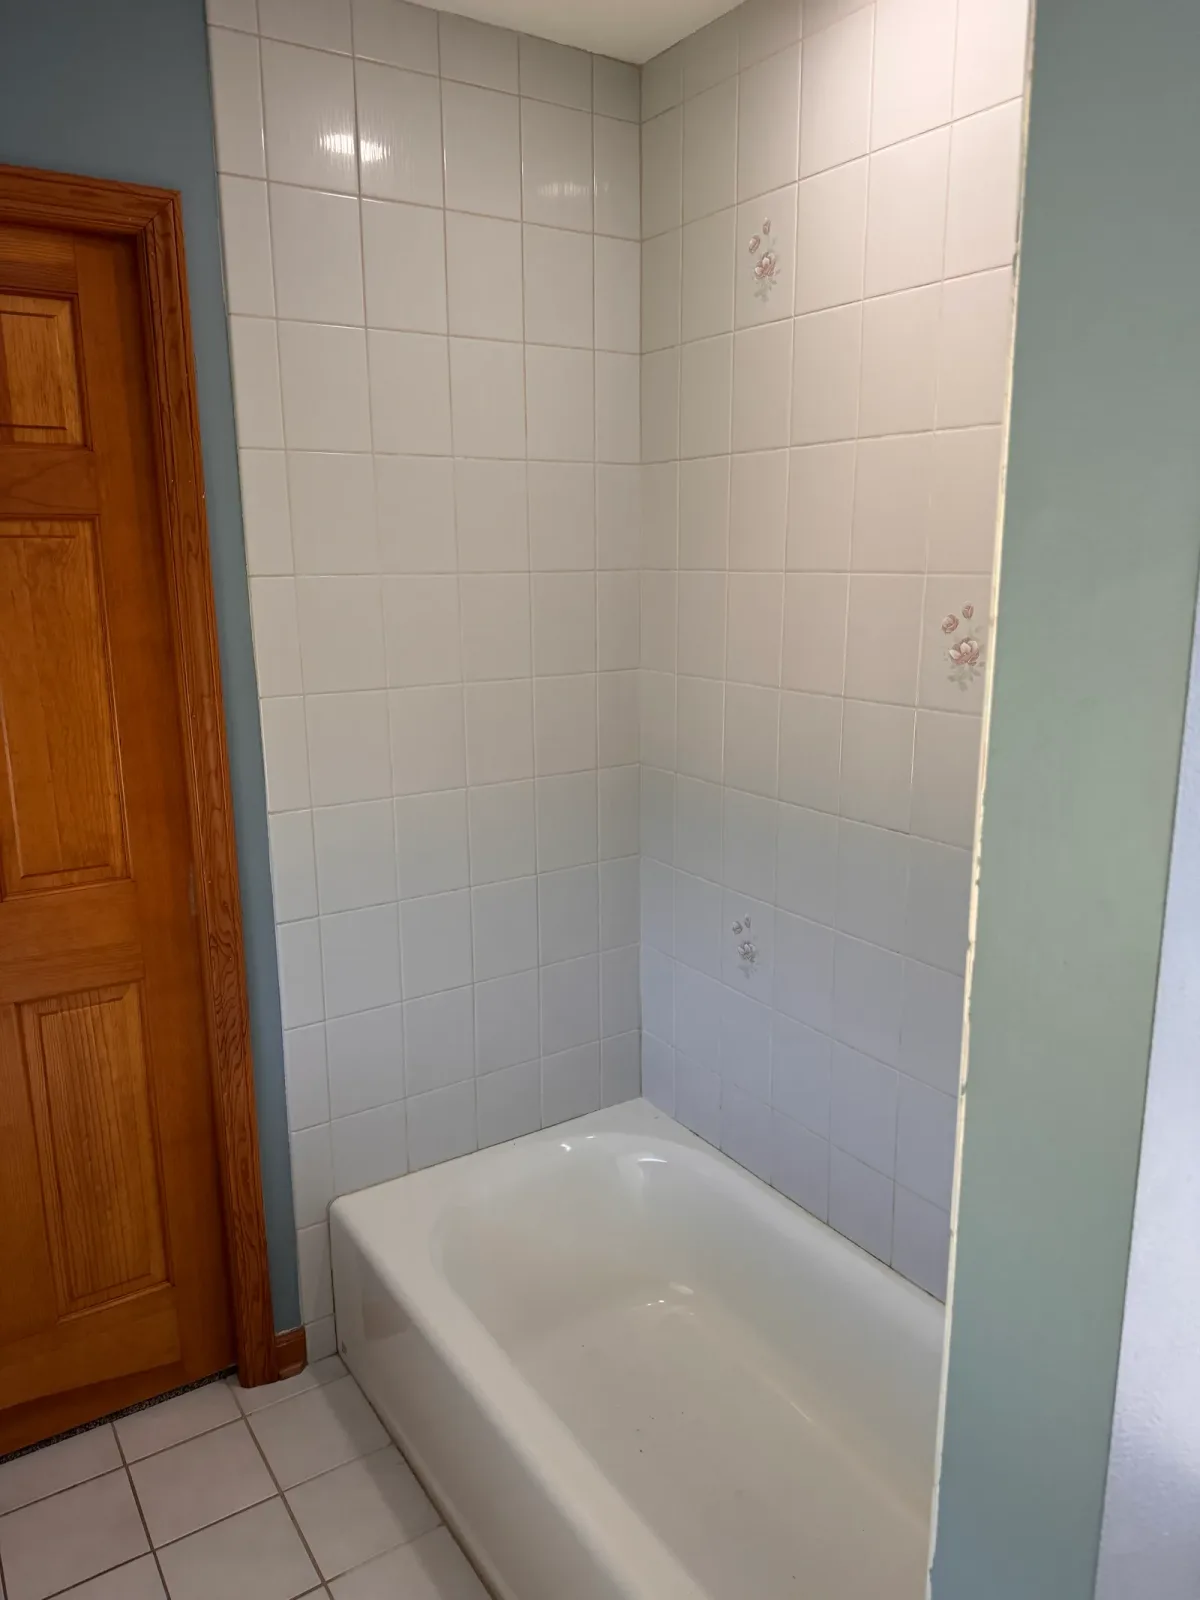
Guest bathroom before photo, Shorewood IL - alcove bathtub in white square wall tile with painted rose accent tiles, beside an oak door and oak casing
Before

The guest tub alcoveWhite square tile, rose accents, oak trim

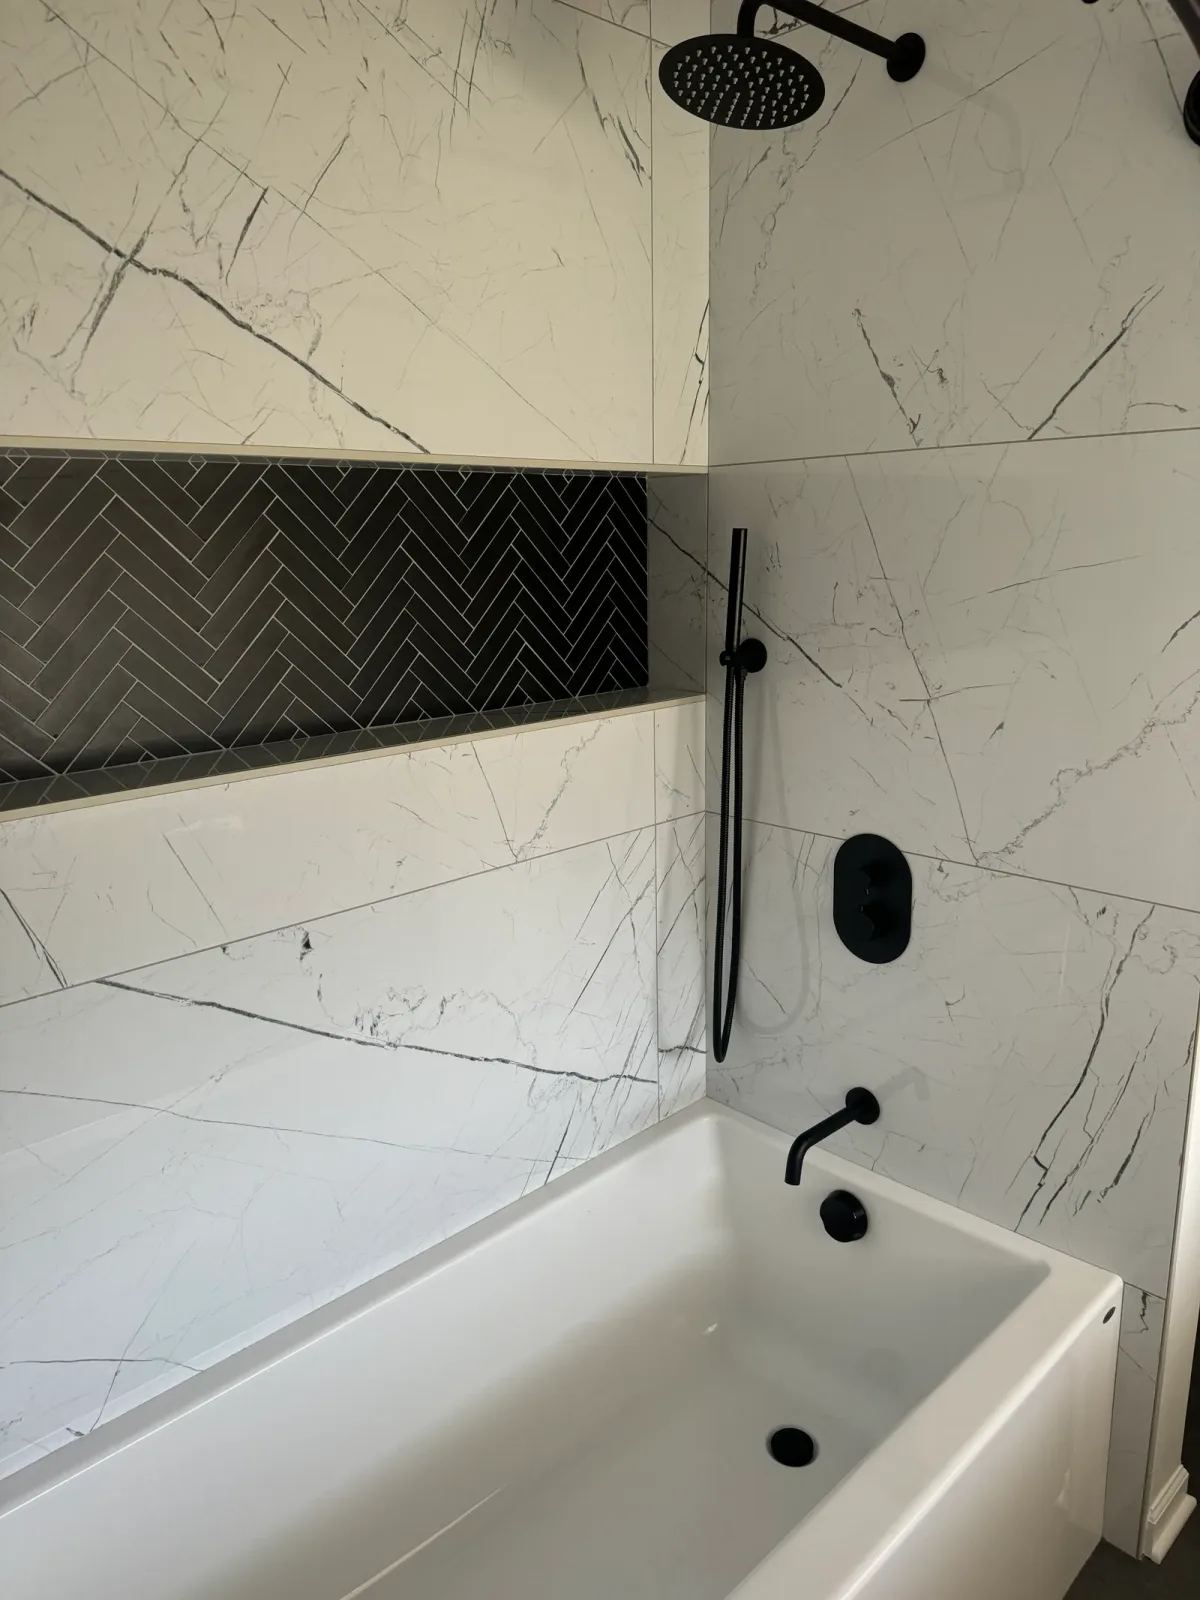
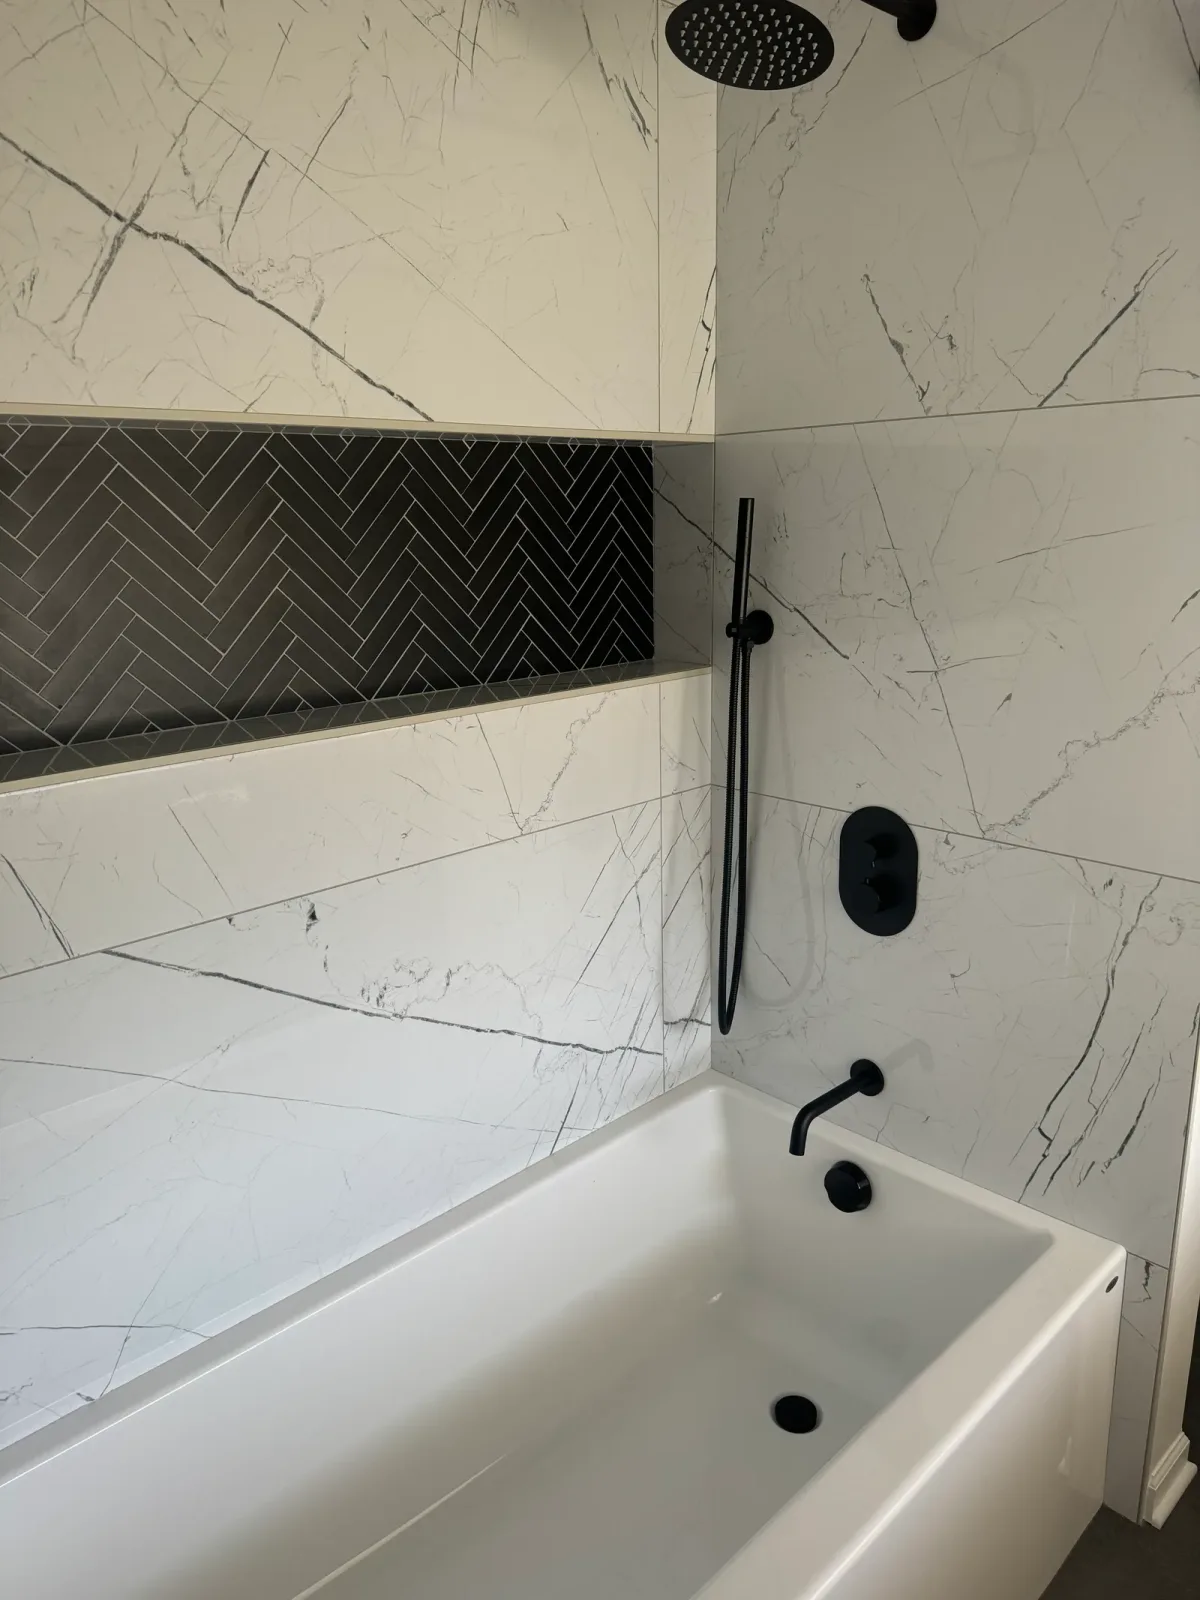
Guest bathroom remodel after photo, Shorewood IL - alcove tub in large-format white marble-look porcelain with a black herringbone niche, a matte-black handshower, control plate and wall spout
After

The guest tub alcoveWhite porcelain, black herringbone, matte black

Same alcove, different end of it. The before looks down the tub from the doorway, with the oak door and casing in the frame; the after stands at the fixture end, so read the surfaces here rather than the geometry. The white square wall tile with its painted rose accents and its grid of grout lines came off, and the oak trim went with it. Large-format white marble-look porcelain went on, broken once by a long recessed niche lined in black herringbone mosaic on a pale stone-look sill. The fittings are matte black throughout: rain head, handshower, control plate and wall spout.

Planning something like this? Request a consultation and walk your space with us.

Request a Consultation Call (312) 445-0727

The Story

Challenge, approach, and result.

The Challenge

Every wet room wore the same era

The primary bath was built around a corner jetted tub set into a tiled deck, with seafoam-green tile countertops, an oval drop-in sink on a clear acrylic-handled faucet, oak cabinetry, a frameless plate mirror and a four-shade light bar. Its shower sat boxed behind a framed sliding-glass enclosure lined in square field tile with painted iris accents. The guest bath answered in white square wall tile with painted rose accents, an oak vanity under a white tile counter, oak trim and an oak door. The tile, the counters, the cabinetry and the fittings all read as one era.

Our Approach

Take the wet rooms at once

Rather than update one bathroom and leave the other to date around it, the primary bath, the guest bath and the laundry were scoped as a single project. In both bathrooms the walls came open to the studs for new supply and waste lines and a framed shower niche, and both material palettes were selected and priced before demolition started.

The Result

Two palettes, one house

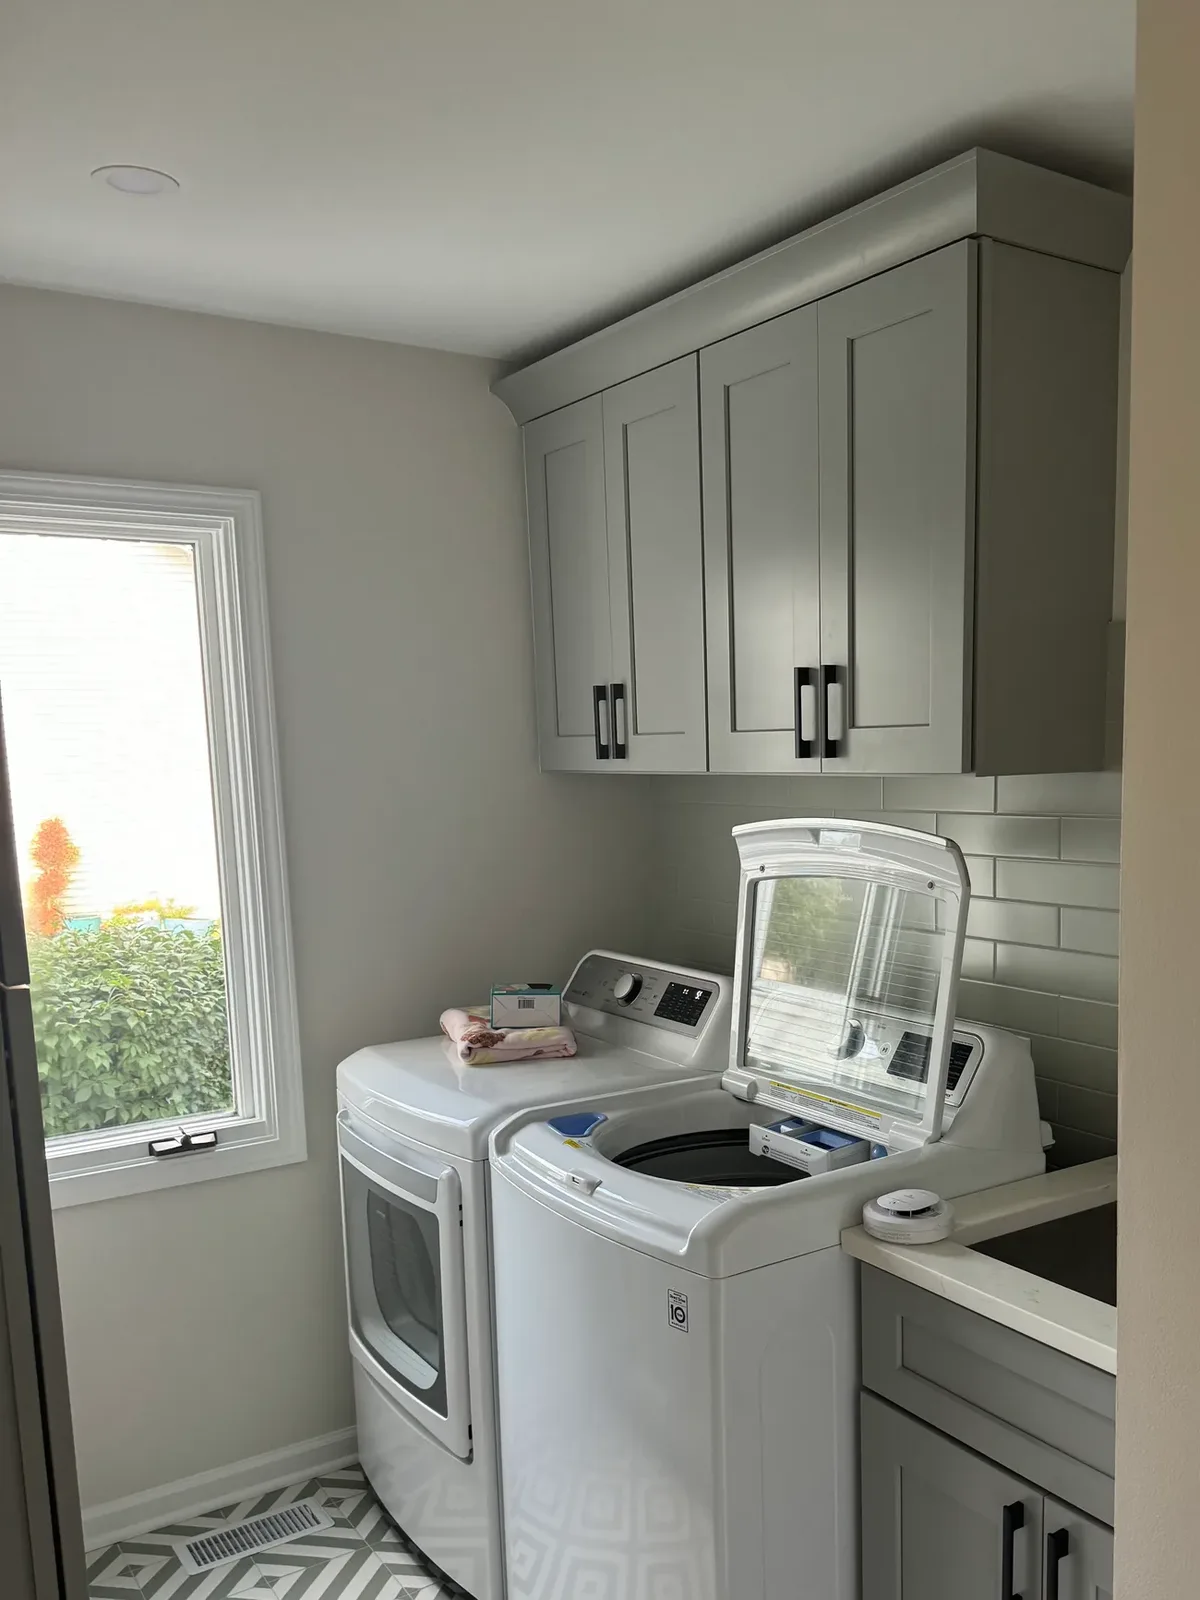
The primary bath reads warm: light-oak cabinetry with brass bar pulls, white quartz with grey veining, a grey marble-look porcelain tub wall, and brass carried from the wall-mounted filler to the shower controls to the globe lighting. The guest bath reads sharp: large-format white marble-look porcelain, a long black herringbone niche, matte-black fittings and a dark grey floor. The laundry sits between them in sage-grey shaker cabinetry over a patterned grey and white floor.

The split is deliberate. Warm oak and brass belong in the room the owners stand in every morning; white porcelain and matte black belong in the room guests use once. Both were drawn, priced and built by one accountable team, which is why the tile, the cabinetry and the fittings in each room land as one decision rather than three.
Our Process

How the Luxe Method shaped this project.

01

Step OneVision & Architecture

We walked every wet room in the house and scoped them as one project. In the primary bath, the corner jetted tub and its tiled deck were the thing eating the floor, so the plan began by deleting the deck and drawing the tub wall first.

02

Step TwoBespoke Curation

Two palettes were selected and priced before anything came out: light oak, white quartz, grey marble-look porcelain and brass for the primary bath; white marble-look porcelain, black herringbone mosaic and matte black for the guest bath; sage-grey shaker cabinetry and a patterned floor for the laundry. Clients approve a fixed, itemized budget, and that number is the number we build. See how the full process works.

03

Step ThreeMaster Construction

The same hands opened the walls, ran new supply and waste lines, framed the shower niche, waterproofed the pans, then set the large-format porcelain, the cabinetry, the quartz tops and the fittings.

04

Step FourWhite-Glove Handover

Every Luxe project ends the same way. Each room is cleaned, photographed and walked before handover, and the finishes are checked against what was drawn and priced.

Nothing in these bathrooms was refreshed or resurfaced — all of it was taken out and rebuilt.

Related Work

The craft behind this project.

This project came out of our bathroom remodeling practice, with the cabinetry specified through our carpentry practice and the two palettes set by interior design. One team drew it, priced it and built it, which is why the tile, the cabinetry and the fittings in each room read as one decision instead of three.

We design and build across Will, DuPage and Cook counties. See the suburbs we work in on our service area page, or browse all projects.

Next project: Black Vanity Bath in Shorewood

Start the conversation

Planning a bathroom project in Mokena?

Walk your space with us. You'll get straight answers, a clear scope, and a fixed, itemized budget before any work begins.

A no-pressure walk-through. No obligation, and the number you approve is the number you build.

Start your projectStep 1 / 5

What are you planning?

Free. No obligation.
Free Site Walkthrough

Ready to rebuild your bathrooms?

Bring us your Shorewood bathroom and see what one accountable team can do with it. We walk the room with you, look at what the layout is wasting, and lay out the scope and the fixed number before anything comes out.

Tap to Call (312) 445-0727